# SpringBoot线程池使用
之前介绍了使用JDK中的ThreadPoolExecutor来创建自定义线程,这里我们来看看Spring中帮我们封装的线程池:ThreadPoolTaskExecutor,它是对ThreadPoolExecutor的封装。
# 使用
在SpringBoot或Spring项目中开启异步线程池,只需要一个注解即可:
// 在Bean类上添加注解
@EnableAsync
@Component
public class ScheduleTask {

}
2
3
4
5
6
# Spring默认线程池simpleAsyncTaskExecutor
没有配置的情况下,默认使用的是simpleAsyncTaskExecutor。
示例如下:
@Component
@EnableAsync
public class ScheduleTask {

    SimpleDateFormat sdf = new SimpleDateFormat("yyyy-MM-dd HH:mm:ss");

    @Async
    @Scheduled(fixedRate = 2000)
    public void scheduleTask1() {
        try {
            Thread.sleep(6000);
            System.out.println("Spring1使用自带的线程池" + Thread.currentThread().getName() + "-" + sdf.format(new Date()));
        } catch (InterruptedException e) {
            e.printStackTrace();
        }
    }

    @Async
    @Scheduled(cron = "*/2 * * * * ?")
    public void scheduleTask2() {
        try {
            Thread.sleep(1000);
            System.out.println("Spring2使用自带的线程池" + Thread.currentThread().getName() + "-" + sdf.format(new Date()));
        } catch (Exception ex) {
            ex.printStackTrace();
        }
    }
}
2
3
4
5
6
7
8
9
10
11
12
13
14
15
16
17
18
19
20
21
22
23
24
25
26
27
28
Spring默认的@Async用线程池名字为SimpleAsyncTaskExecutor,而且每次都会重新创建一个新的线程,所以可以看到TaskExecutor-后面带的数字会一直变大。
SimpleAsyncTaskExecutor的特点是,每次执行任务时,它会重新启动一个新的线程,并允许开发者控制并发线程的最大数量(concurrencyLimit),从而起到一定的资源节流作用。默认是concurrencyLimit取值为-1,即不启用资源节流。
# 自定义线程池
使用默认的方法有的时候会照成服务器资源耗尽,我们不能无止境的创建线程。这里我们需要自定义线程池。
# ExecutorConfig.java
配置线程池参数
import org.springframework.context.annotation.Bean;
import org.springframework.context.annotation.Configuration;
import org.springframework.scheduling.annotation.EnableAsync;
import org.springframework.scheduling.concurrent.ThreadPoolTaskExecutor;

import java.util.concurrent.Executor;
import java.util.concurrent.ThreadPoolExecutor;

@Configuration
@EnableAsync
public class ExecutorConfig {
    /**
     * 自定义线程池
     * @return
     */
    @Bean("dataCollectionExecutor")
    public Executor dataCollectionExecutor() {

        ThreadPoolTaskExecutor executor = new ThreadPoolTaskExecutor();

        // 设置核心线程数
        executor.setCorePoolSize(20);
        // 设置最大线程数
        executor.setMaxPoolSize(50);
        // 设置队列容量
        executor.setQueueCapacity(100);
        // 设置线程活跃时间(秒)
        executor.setKeepAliveSeconds(60);
        // 设置默认线程名称
        executor.setThreadNamePrefix("sunbt-");
        // 设置拒绝策略
        executor.setRejectedExecutionHandler(new ThreadPoolExecutor.CallerRunsPolicy());
        // 等待所有任务结束后再关闭线程池
        executor.setWaitForTasksToCompleteOnShutdown(true);
        return executor;
    }

}
2
3
4
5
6
7
8
9
10
11
12
13
14
15
16
17
18
19
20
21
22
23
24
25
26
27
28
29
30
31
32
33
34
35
36
37
38
# ScheduleTask.java
在方法上添加@Async注解,然后还需要在@SpringBootApplication启动类或者@Configuration注解类上 添加注解@EnableAsync启动多线程注解,@Async就会对标注的方法开启异步多线程调用,注意,这个方法的类一定要交给Spring容器来管理。
@Component
public class ScheduleTask {

    SimpleDateFormat sdf = new SimpleDateFormat("yyyy-MM-dd HH:mm:ss");

    @Async("dataCollectionExecutor")
    @Scheduled(fixedRate = 2000)
    public void testScheduleTask() {
        try {
            Thread.sleep(6000);
            System.out.println("Spring1使用自带的线程池" + Thread.currentThread().getName() + "-" + sdf.format(new Date()));
        } catch (InterruptedException e) {
            e.printStackTrace();
        }
    }

    @Async("dataCollectionExecutor")
    @Scheduled(cron = "*/2 * * * * ?")
    public void testAsyn() {
        try {
            Thread.sleep(1000);
            System.out.println("Spring2使用自带的线程池" + Thread.currentThread().getName() + "-" + sdf.format(new Date()));
        } catch (Exception ex) {
            ex.printStackTrace();
        }
    }
}
2
3
4
5
6
7
8
9
10
11
12
13
14
15
16
17
18
19
20
21
22
23
24
25
26
27
@Async("dataCollectionExecutor")指定一下我们上面配置的线程池。从这里可以看出来我们可以创建多个线程池,对不同需求的异步方法使用不同的线程池。
注意:
之前我犯了个错误,我在同一个类中使用异步注解到某个方法上,然后本类直接调用这个方法,这样异步线程是不起作用的,需要注入进来。同一类依赖自己会产生循环依赖问题,这里我们使用@Lazy注解来配置一下,这样就不会产生循环依赖问题。
    @Lazy
    @Resource
    ScheduleTask scheduleTask;
2
3
# 多线程异步方法立马返回
# ThreadTask.java
新建异步任务方法
import org.springframework.scheduling.annotation.Async;
import org.springframework.scheduling.annotation.AsyncResult;
import org.springframework.stereotype.Component;

import java.util.concurrent.Future;

@Component
public class ThreadTask {
    /**
     * 异步执行,不等待
     *
     * @param num 任务编号
     */
    @Async("dataCollectionExecutor")
    public void start1(int num) {
        System.out.println("当前任务编号为:" + num);
    }

}
2
3
4
5
6
7
8
9
10
11
12
13
14
15
16
17
18
19
20
# ThreadTest.java
新建测试类方法
import cn.hutool.core.date.DateUnit;
import cn.hutool.core.date.DateUtil;

import com.demo.DemoApplication;
import com.demo.task.PictureTask;
import com.demo.task.ThreadTask;
import org.junit.jupiter.api.Test;
import org.junit.runner.RunWith;
import org.slf4j.Logger;
import org.slf4j.LoggerFactory;
import org.springframework.boot.test.context.SpringBootTest;
import org.springframework.test.context.junit4.SpringRunner;

import javax.annotation.Resource;
import java.util.ArrayList;
import java.util.Date;
import java.util.concurrent.Future;


@RunWith(SpringRunner.class)
@SpringBootTest(classes = DemoApplication.class)
class ThreadTest {

    @Resource
    ThreadTask threadTask;

    @Test
    void test1() {
        Date date = new Date();
        for (int i = 0; i < 100; i++) {
            try {
                threadTask.start1(i);
            } catch (Exception e) {
                System.out.println(e.getMessage());
            }
        }
        log.info("本次任务完成耗时" + DateUtil.between(date, new Date(), DateUnit.SECOND) + "秒");
    }


}
2
3
4
5
6
7
8
9
10
11
12
13
14
15
16
17
18
19
20
21
22
23
24
25
26
27
28
29
30
31
32
33
34
35
36
37
38
39
40
41
42
43
结果如下:
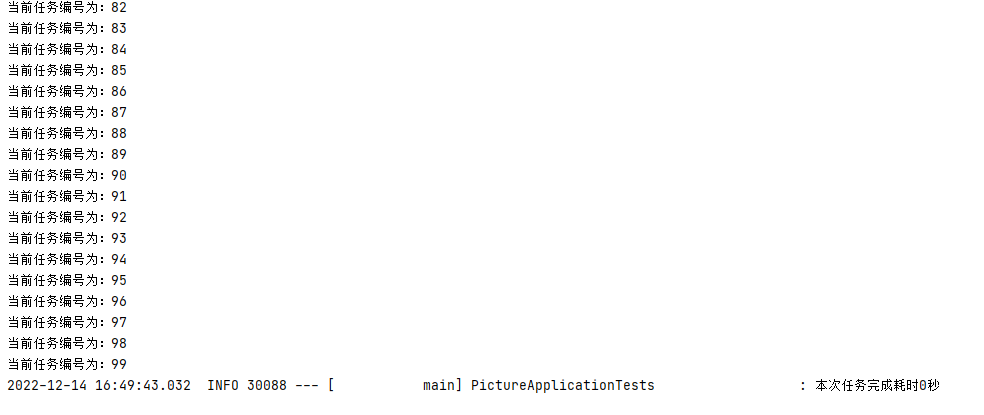
任务时长为0秒,因为我们是异步方法不等待结果就返回了,任务没结束会在后台运行。
# 多线程异步方法等待任务全部执行完
# 使用场景
某个线程需要在其他n个线程执行完毕后再向下执行
多个线程并行执行同一个任务,提高响应速度
# 方法一:CountDownLatch
CountDownLatch是一个同步工具类,用来协调多个线程之间的同步,或者说起到线程之间的通信(而不是用作互斥的作用)。
CountDownLatch能够使一个线程在等待另外一些线程完成各自工作之后,再继续执行。使用一个计数器进行实现。计数器初始值为线程的数量。当每一个线程完成自己任务后,计数器的值就会减一。当计数器的值为0时,表示所有的线程都已经完成一些任务,然后在CountDownLatch上等待的线程就可以恢复执行接下来的任务。
# ThreadTask.java
import org.springframework.scheduling.annotation.Async;
import org.springframework.scheduling.annotation.AsyncResult;
import org.springframework.stereotype.Component;

import java.util.concurrent.CountDownLatch;
import java.util.concurrent.Future;

@Component
public class ThreadTask {
    /**
     * 异步执行,等待返回
     *
     * @param num 任务编号
     */
    @Async("dataCollectionExecutor")
    public void start2(int num, CountDownLatch latch) {
        try {
            Thread.sleep(2000);
        } catch (InterruptedException e) {
            e.printStackTrace();
        }
        System.out.println("当前任务编号为:" + num);
        latch.countDown();
        new AsyncResult<String>(String.valueOf(num));
    }
}
2
3
4
5
6
7
8
9
10
11
12
13
14
15
16
17
18
19
20
21
22
23
24
25
26
27
# ThreadTest.java
import cn.hutool.core.date.DateUnit;
import cn.hutool.core.date.DateUtil;

import com.demo.DemoApplication;
import com.demo.task.PictureTask;
import com.demo.task.ThreadTask;
import org.junit.jupiter.api.Test;
import org.junit.runner.RunWith;
import org.slf4j.Logger;
import org.slf4j.LoggerFactory;
import org.springframework.boot.test.context.SpringBootTest;
import org.springframework.test.context.junit4.SpringRunner;

import javax.annotation.Resource;
import java.util.ArrayList;
import java.util.Date;
import java.util.concurrent.Future;


@RunWith(SpringRunner.class)
@SpringBootTest(classes = DemoApplication.class)
class ThreadTest {

    @Resource
    ThreadTask threadTask;

    @Test
    void test() {
        Date date = new Date();
        CountDownLatch latch = new CountDownLatch(100);
        for (int i = 0; i < latch.getCount(); i++) {
            threadTask.start2(i,latch);

        }
        try {
            latch.await();
        } catch (InterruptedException e) {
            e.printStackTrace();
        }

        log.info("本次任务完成耗时" + DateUtil.between(date, new Date(), DateUnit.SECOND) + "秒");
    }
}
2
3
4
5
6
7
8
9
10
11
12
13
14
15
16
17
18
19
20
21
22
23
24
25
26
27
28
29
30
31
32
33
34
35
36
37
38
39
40
41
42
43
44
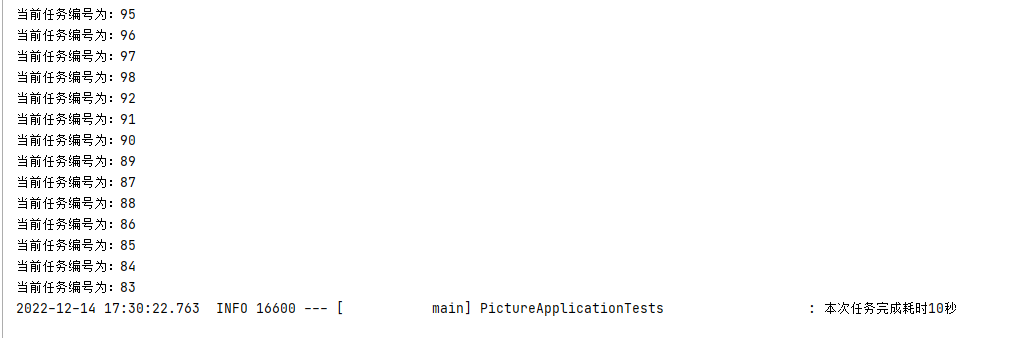
結果如下:
可以看出主线程等待所有子线程结束后再结束。
# 方法二:Future
Future表示一个可能还没有完成的异步任务的结果,针对这个结果可以添加Callback以便在任务执行成功或失败后作出相应的操作。
借助Future也可以实现CountDownLatch的效果
# ThreadTask.java
import org.springframework.scheduling.annotation.Async;
import org.springframework.scheduling.annotation.AsyncResult;
import org.springframework.stereotype.Component;

import java.util.concurrent.CountDownLatch;
import java.util.concurrent.Future;

@Component
public class ThreadTask {
    /**
     * 异步执行,等待返回
     *
     * @param num 任务编号
     * @return Future
     */
    @Async("dataCollectionExecutor")
    public Future<String> start2(int num) {
        try {
            Thread.sleep(2000);
        } catch (InterruptedException e) {
            e.printStackTrace();
        }
        System.out.println("当前任务编号为:" + num);
        return new AsyncResult<String>(String.valueOf(num));
    }

}
2
3
4
5
6
7
8
9
10
11
12
13
14
15
16
17
18
19
20
21
22
23
24
25
26
27
28
# ThreadTest.java
import cn.hutool.core.date.DateUnit;
import cn.hutool.core.date.DateUtil;

import com.demo.DemoApplication;
import com.demo.task.PictureTask;
import com.demo.task.ThreadTask;
import org.junit.jupiter.api.Test;
import org.junit.runner.RunWith;
import org.slf4j.Logger;
import org.slf4j.LoggerFactory;
import org.springframework.boot.test.context.SpringBootTest;
import org.springframework.test.context.junit4.SpringRunner;

import javax.annotation.Resource;
import java.util.ArrayList;
import java.util.Date;
import java.util.concurrent.Future;


@RunWith(SpringRunner.class)
@SpringBootTest(classes = DemoApplication.class)
class ThreadTest {

    @Resource
    ThreadTask threadTask;

    @Test
    void test() {
        Date date = new Date();
        ArrayList<Future<String>> futures = new ArrayList<>();
        for (int i = 0; i < 100; i++) {
            try {
                Future<String> future = threadTask.start2(i);
                futures.add(future);
            } catch (Exception e) {
                System.out.println(e.getMessage());
            }
        }
        while (futures.size() != 0) {
            for (int i = 0; i < futures.size(); i++) {
                if (futures.get(i).isDone()) {
                    futures.remove(i);
                }
            }
        }
        log.info("本次任务完成耗时" + DateUtil.between(date, new Date(), DateUnit.SECOND) + "秒");
    }


}
2
3
4
5
6
7
8
9
10
11
12
13
14
15
16
17
18
19
20
21
22
23
24
25
26
27
28
29
30
31
32
33
34
35
36
37
38
39
40
41
42
43
44
45
46
47
48
49
50
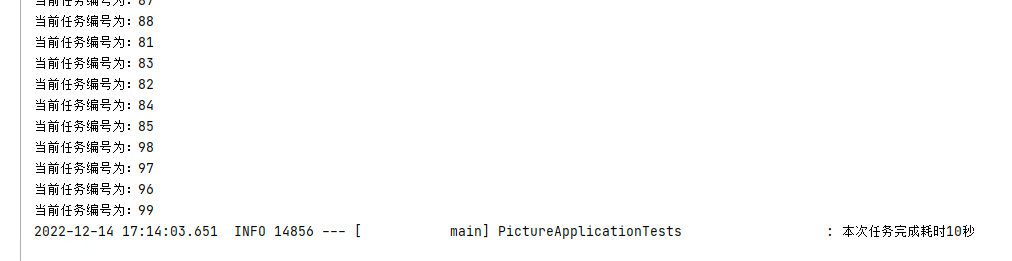
结果如下: